Category Archives: stereo repair

Alex Audio & Video is a one stop Stereo Repair shop in Minneapolis/St Paul. Pioneer, Denon, Onkyo, Yamaha, Integra, Marantz, Rotel, Sansui, Sony, MN USA

HDMI Stereo troubleshooting tips

  • It seems a number of people are experiencing problems with the HDMI in the new A/V receivers.
  • If you have experienced any of these issues you may have a bad HDMI board in A/V receiver.

Audio & Vintage Stereo Receiver Repair MN USA

HDMI Stereo troubleshooting tips

What HDMI cable do I need? Obviously not every everyone need 2.0 HDMI cable and 1.4  may work ok. There were numerous changes was made to support for higher frame higher resolution wide aspect ratio and more. Hdmi cable problems symptoms

  • If works ok it-is most likely the HDMI board bad in your receiver.
  • Connect HDMI cable directly to TV bypassing the audio receiver and see if it works.
  • Best Choice use most current version of HDMI cable first install most current version of HDMI cable 2.0 compliant and see if help.
  • What are the key advanced features enabled by HDMI 2.0b?
    • Enables transmission of High Dynamic Range (HDR) video
    • Bandwidth up to 18Gbps
    • 4K@50/60 (2160p), which is 4 times the clarity of 1080p/60 video resolution
    • Up to 32 audio channels for a multi-dimensional immersive audio experience
    • Up to 1536kHz audio sample frequency for the highest audio fidelity
    • Simultaneous delivery of dual video streams to multiple users on the same screen
    • Simultaneous delivery of multi-stream audio to multiple users (Up to 4)
    • Support for the wide angle theatrical 21:9 video aspect ratio
    • Dynamic synchronization of video and audio streams
    • CEC extensions provide more expanded command and control of consumer electronics devices through a single control point

    Reed More about HDMI Cable  

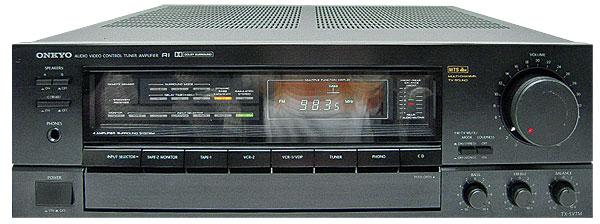
  • Home stereo troubleshooting tips

  • Stereo troubleshootingIf you have lights on your vintage receiver but no sound check Tape Monitor switch.
  • If you are using Master Remote for your Home Theater be sure all units are off before you turn it on.
  • Verify if Receiver is on right input for audio and video.
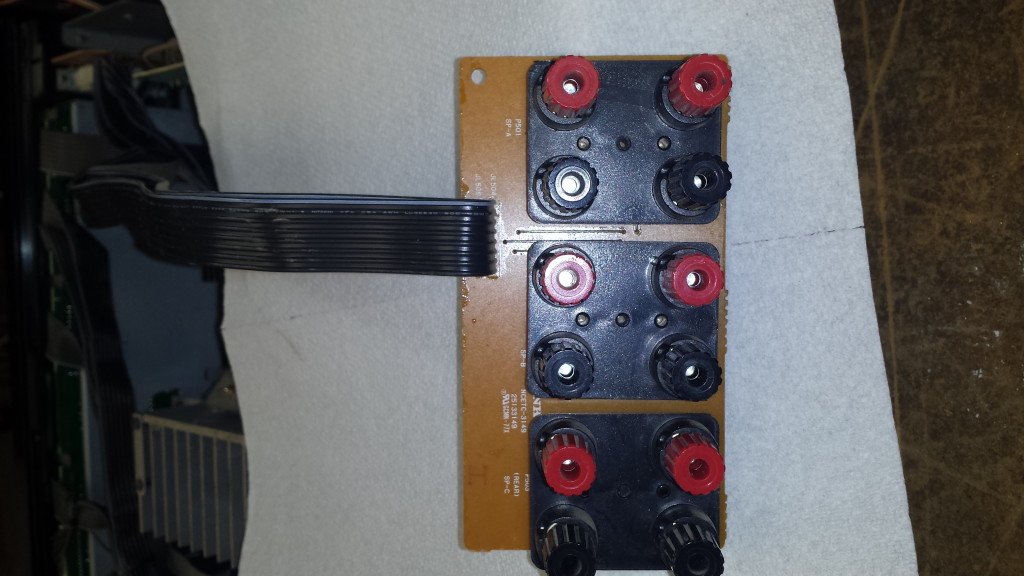
  • Verify if Receiver/Amplifier is set on right speakers output and use correct speaker and wires see below.
  • Turn off your receiver or amplifier before inspecting speaker connections.
  • Be sure to check speaker wires on receiver and speakers look for damage or loose connections and whiskers.
  • Make sure that the insulation is adequately stripped on both ends of the wires and they are not touching each other and not damage receiver.
  • Speaker wire lengths for two conductor copper wire.
  • Wire size                4 Ω load           8 Ω load
  • 22 AWG                     6 ft                  12 ft
  • 20 AWG                   10 ft                   20 ft
  • 18 AWG                   16 ft                   32 ft
  • 16 AWG                   24 ft                   48 ft
  • 14 AWG                   40 ft                   80 ft
  • 12 AWG                   60 ft                 120 ft
  • 10 AWG                 100 ft                 200 ft

Remember if you using 8 ohm speakers in A and B then it will be 4 ohm. A speaker wire resistance must be less than 5% of the speaker impedance not to have negative effect.

Read more about speaker wire

Cleaning Vintage Stereo Receivers

Cleaning vintage stereo receivers and amps 1970 to 1980. It is not a small and easy job. Even basic cleaning will take you 2-3 hours and most likely will not be done correctly.  If you are  not experienced do not start because it looks easier but becomes complicated very fast.

How to Clean Vintage Stereo Equipment

  • Before you start cleaning controls and switches turn off the unit and unplug electrical cord!
  • Be careful electrolytic capacitors may stay charged even after has been unplugged for long time which can shock or burn your hand or damage other components 

Cleaning vintage stereo receivers controls and switches Pioneer SX-1250 receiverAvoid using products on your stereo equipment that are not intended for use on plastics in your stereo like WD-40.

  • Warning never ever spray cleaning solution on boards when unit is turned on you will short circuit and have expensive repair bill.
  • You can do a good job or destroy your receiver or amp very easily and electrocute yourself.
  • Dust will not affect performance of your receivers or amps and oxidation will. 30-40 year old vintage receiver need extensive DeoxIT D5 cleaning and Deoxit Faderlube for lubrication.
  • You can cosmetically clean unit using compressor, compressed air, denature alcohol preferably 91 to 99% and q-tips to clean parts and DeoxIT D5 (red )  contact cleaners to clean switches and DeoxIT Faderlube F5 (green) for lubrication
  • Remove top and bottom put screws in small bags and attach related screws to top and bottom covers so you put back right screws to right places.
  • You have to remove knobs and front panel for cleaning and create access to controls and switches. Note some knobs secured by screws especially tuning and volume knob you need long Allen wrench 1.5mm-2.5mm.
  • Do not force because you may break control or switch. Inspect careful and if you see a hole on the side of knob you have a security screw inside.

Cleaning vintage stereo receivers

  • Can or 2 of compressed air or Compressor to blow dust.
  • Small to medium paint brush to clean dust inside you must be very careful not to bend or damage any parts.
  • Here I am ready for cleaning Pioneer SX-1250 receiver controls and switches.
  • Note you need Allen wrench 2mm  to remove knobs and front panel to get excess to controls and switches each model deferent so you most likely need remove control panels.
  • Note do not spray in front off controls it will never solve the problems.

    cleaning vintage receivers DeoxIT D5, DeoxIT D6
  • For Controls and Switches you need DeoxIT D5 cleaner it is general purpose cleaner.
  • For all metal surfaces with  oxidation and corrosion.
  • Use DeoxIT® to dissolve contamination, as well as lubricate and protect the surface DeoxIT D5® has approximately 20% cleaning action.
  • If you use DeoxIT D5 follow by Faderlube F5 on pots.
  • Sliders and faders use only Fader F5-Series is a precision lubricant specifically formulated to improve conductivity and lubricate conductive plastic and carbon compound faders and similar components.
  • Note you do not need much and must be sprayed only in controls and switches you spray on top you see small holes and inside of shaft and push in and out.
  • If volume control sealed soak on top and rotate after. Let seat for couple hours and repeat again repeat 2 to 3 times and let seat over night clean lust time and assemble partially together for test.
  • Do not spray DeoxIT or any cleaner on boards tuning capacitor or you have problems and smoke!!
  •   Cleaning vintage stereo receivers and repair is ours  specialty give us a call we can help! 

Bad speaker wires can damage your receiver

  • Speaker wires may be the most common culprit to damaged speakers, receivers and amps. 
  •  Consumers were convinced they need 10AWG -12AWG monster speaker wires to get good sound.
  • If the wire is not trimmed properly and has whiskers it can short output transistors.
  • Obviously it-is important to know how distance and resistance affect gauge of speaker wires. (Read beloSpeaker wires-4w).
  • You shuld know the length of speaker wires directly affect the gauge of the wires the lower the resistance the better the results.
  • Most importantly it is not the gauge or type of speaker wire you use but how well it is connected.

    Stereo Repair USA

  •  If I open a receiver and inspect wire connections from the speaker protection relay to the back speaker connectors in most cases you find it is only 28 to 24 gauge wires on 100W per channel amp.
  • So if your speaker is located 10 feet from receiver or amp you don’t need 12 gauge wires. 16 gauge wires will be more than enough.

    Onkyo TX-SV7M
    The Onkyo Onkyo TX-SV7M receiver retailed for $1,000, and that was a lot of money 25 years ago!
  • The biggest problem with large gauge wire is you can’t fit to the connectors on receiver or speakers wires touch each other and it not possible to make good connections.
  • It is very important wires fit the opening on t
    Onkyo TX-SV7M
    Onkyo TX-SV7M Power output was specified at 90 watts per channel for the front left and right channels and have 28 to 24 gauge internal speaker connection wires.

    he receiver speaker connectors and make a good strong connection without touching each other. 5 Myths About Speaker Wire 

Speaker wires solution and help

  • Rule number one turn off your receiver when you are inspecting your wires or you could damage your receiver.
  • Therefore inspect your speaker wires and see if they are looking good, no whiskers and if they are securely connected on receiver and on the speaker connectors.
  • Then again trim wire and twist them tightly and carefully install back and secure connector tightly.
  • Obviously if you need help,  we will trim end connections with solder and color code them with shrinking tube material.
  • The most important preventive measure to ensure no damage to the receiver and have quality sound is very good speaker wire connections.
  • Of course good connections will get the best sound from inexpensive speaker wires and also bad results from expensive wires which could damage your equipment.
  • To sum up I am not telling you what speaker wire to use.
  • Obviously you have to understand how important to have clean and solid connections or you will damage your equipment.

Read more about speaker wires audiophile tests

 http://www.roger-russell.com/wire/wire.htm#reviewdares

Maximum Speaker wire lengths for two conductor copper wires.

  • Wire size                4 Ω load           8 Ω load
  • 22 AWG                      6 ft                   12 ft
  • 20 AWG                   10 ft                   20 ft
  • 18 AWG                   16 ft                   32 ft
  • 16 AWG                   24 ft                   48 ft
  • 14 AWG                   40 ft                   80 ft
  • 12 AWG                   60 ft                 120 ft
  • 10 AWG                 100 ft                 200 ft


Computer and Stereo Repair

TV Computer Stereo Repair Give us a call, we can fix-it!

Life is too short enjoying every second of it.

TV Computer Stereo Repair

Two antennas met on top of the roof. They fell in love and got married. The ceremony was horrible, but the reception was excellent. Working together and playing together. Working hard to make you happy! Our work ethic is top notch. We can`t always fix everything, but that is our goal. TV Computer Stereo Repair is our business. Providing DLP lamps, accessories, and information is an added bonus! Give us a call, we can fix-it!

Stereo Repair

We are one stop authorized Stereo Repair Shop. Specialize in repair of major brands of Japanese Home Theater receivers and vintage stereo receivers.  AV receivers, amplifiers, preamps, DJ systems, CD players, powered speakers, tape recorders, subwoofers, tuners and turntables.

Computer Repair

We offer a range of Technical, IT support and Computer Repair for small and mid-sized businesses in the Minneapolis Saint Paul MN. Building customized computers and servers and VOIP for banks, churches, distributors, doctors, law firms, and small business. .

TV Repair

TV Repair service center Minneapolis St Paul. LCD/LED TV, 4K TV, Plasma TV, DLP TV,  From Panasonic Plasma TV to Samsung UHD TV we can fix-it!


Vintage stereo receiver How to find good one

  • Vintage stereo receiver It is harder to find but it not impossible.
  • Best places to find vintage stereo receiver is garage sales, thrift stores, estate sales, parents and grandparents.

vintage stereo receiverFrom our experience people who bought vintage stereo receivers do not always got good deal it is chance you take. Good vintage stereo receiver is not sold cheaply. Now a day’s most people know the value of good vintage receiver. The only problem when you are buying is you have no idea if it-is in good condition or not and you may overpay.

Find vintage stereo receiver

  • Do your homework and if you pick from Marantz, Pioneer SX, Sansui,  Kenwood KR, TechnicsRotel RA, Sherwood, Harman KardonYamaha CR and many others of 70 and 80’s vintage most likely you not go wrong by by choosing in this order.
  • So if the unit is somewhat working that is a good sign because it may not require major expenses.
  • Much emphasis primarily through the internet and YouTube suggests that in order to have good quality sound from your vintage receiver you must replace “all” capacitors is not true. “If it is not broke do not fix it”.
  • Most repairs may require a replacement of  electrolytic capacitors in the power supply, noisy transistors in audio path, example 2sa725, 2sa726,2sc1312, 2sc1313 in preamp circuits, replace lamps if needed, cleaning speaker relay, and cleaning/DeoxIT and lubing the controls and switches.
  • It definitely depends on the unit condition. Receiver that stored for many years most likely will need less work.
  • Others were running constantly in a closed environment which makes many capacitors go bad capacitors do not like heat.